Starlight Evening Gloves (c)Severina/A Murphy
Formerly published at the now defunct Magknits.
Description of Design: Starlight Evening Gloves make use of a simple all-over eyelet stitch and a faggoting stitch "seam" as their focal point. They were designed using a stocking formula to create a glove that should fit nearly anyone--the resulting fit should make it worth the extra effort. While these very long gloves were knitted from a shiny rayon/cotton blend yarn, they could look equally elegant in a soft cashmere, and for a fun look try them in a glittery lurex. The pattern formula should lend itself to many yarn variations.
Difficulty Level: Intermediate
Materials needed: Sample gloves were knitted from eight ounces of rayon/cotton blend fiber hand spun into a shiny/nubby two ply yarn. One set of size 2 US (2 mm) double pointed needles. Stitch holders. Stitch markers. Tapestry needle. Yarn substitutes: Jaeger Silk 4 ply, four 50 gram balls, Jet Black or Tapestry. Schachenmayer Regia Stretch, four 50 gram balls, Black. Garnstudio Cotton Viscose, four 50 gram balls, Navy, Scarlet Red, or Shocking Pink. Rowan Cotton Glace, four 50 gram balls, Black, Excite, or Passion.
Sizes: Palm circumference: 5 inch / 13 cm (6 inch/ 15 cm, 7 inch /1 cm) Arm sizes adjustable with formula.
Gauge: 32 stitches and 40 rows measured over 4 inches.
Schematics:

Stitch instructions
Simple Eyelet Pattern: Multiple of 8 stitches.
Row 1: (Right side) Knit.
Row 2 and all other wrong-side rows: Purl.
Row 3: *K 6, yo, k2 tog, rep from *.
Row 5: Knit.
Row 7: K2, * yo, k2 tog, k6, rep from *, end last rep k4.
Row 8: Purl.
Faggoting Stitch: Multiple of 4 stitches.
Row 1: K1, yo, k2 tog, k1.
Row 2: K1, k2 tog, yo, k1.
 Pattern: In order to calculate stitch count for arm you will have to take several measurements: Circumference of upper arm, wrist, and palm; and length from armpit (or desired length) to wrist.
Multiply number of stitches per inch in your gauge swatch by the number of inches in upper arm circumference and wrist circumference. Round off both to even numbers.
Subtract wrist number from upper arm number. This will be the number of stitches you will decrease between upper arm and wrist. Divide this number by two since you will be decreasing two stitches each time.
Length between upper arm and wrist divided by number of stitches decreased will give the frequency of decreases.
Sample gloves started out with a measurement of 10 inches at the upper arm. 8 gauge stitches X 10 inches = 80 cast on stitches. Wrist measurement was 6 inches X 8 gauge stitches = 48 stitches. 80 - 48 = 32, divided by 2 = 16. Two decreases were made 16 times, and since arm length of sample glove was 18 inches decreases were made approximately every inch.
Circumference of palm gives glove size. Stitch count at wrist may be the same as palm or some stitches may have to be increased.
Right Glove
Arm: Cast on stitches from upper arm number and divide between three needles. Work in K1, P1 rib for 1 inch (2.5 cm). Count stitches on first needle and subtract 4, then divide resulting number by two. Place marker at this point. This is where the Fagoting Stitch "seam" will start.
Work Simple Eyelet Stitch to marker, work Faggoting Stitch, place second marker, then work eyelet stitch around the rest of unworked stitches. Work in pattern for at least 1 inch before starting decreases to establish eyelet pattern.
Decreases are worked on either side of markers. Become familiar with how the eyelets are placed as they are worked so that the pattern stays uniform as stitches are decreased.
Continue to work arm in pattern, making sure you try the glove on to check fit and desired length.
When desired length to wrist has been reached discontinue Faggoting Stitch.
 Glove Preperation: Size small is 46 stitches, medium is 48 stitches, and large is 50 stitches. You will have to rearrange stitches on needles: small 23, 11, 12; medium 24, 12, 12; large 25, 12, 13. The largest number is on the first needle with the faggoting stitch in the center as for upper arm. This will make sure faggoting is in center of palm.
Discontinue eyelet stitch on palm of glove (first needle) to ensure that the pattern will line up properly. Line up eyelet pattern on back of hand.
Palm: Work 4 rounds as established, discontinuing eyelet and faggoting stitch on palm and increasing stitches for hand as needed.
Thumb increases: K2, place marker, inc 1 sts, k2, inc 1 st, place marker, work in pattern around. Work without increasing for 2 rounds. Repeat these three rounds until there are 12 (14, 14) stitches between markers, working thumb only in \b eyelet stitch\b0 .
Work in pattern as established until piece reaches desired length from wrist to base of thumb. K2 sts, place next 12 (14, 14) stitches to stitch holder. Cast on 4 sts and work to end of round.
Work hand in pattern as established until piece reaches desired length to base of index finger.
Index Finger: Take 6 (6, 7) sts from palm and 7 (7, 8) sts from back of hand and place remaining sts on stitch holders. Divide the 13 (13, 14) stitches between three needles. Cast on 2 sts between palm and back of hand. Work around in eyelet stitch, lining up eyelets with pattern on back of hand, until index finger is 1/4 inch from tip. *K2 tog. Repeat from * around. Next round-K around. Break yarn, leaving a tail. Thread yarn through tapestry needle and pull through remaining sts and pull tight. Darn in end.
Middle Finger: Take 6 (6, 6) sts from palm and 6 (7, 7) sts from back of hand and place remaining sts on stitch holders. Place the 12 (13, 13) stitches between two needles. Cast on 2 sts between palm and back of hand and pick up 2 sts from cast-on sts of index finger. Divide sts between three needles. Work around in eyelet stitch, lining up eyelets with pattern on back of hand, until index finger is 1/4 inch from tip. *K2 tog. Repeat from * around. Next round-K around. Break yarn, leaving a tail. Thread yarn through tapestry needle and pull through remaining sts and pull tight. Darn in end.
Ring Finger: Take 5 (5, 5) sts from palm and 5 (6, 6) sts from back of hand and place remaining sts on stitch holders. Place the 10 (11, 11) stitches between two needles. Cast on 2 sts between palm and back of hand and pick up 2 sts from cast-on sts of middle finger. Divide sts between three needles. Work around in eyelet stitch, lining up eyelets with pattern on back of hand, until index finger is 1/4 inch from tip. *K2 tog. Repeat from * around. Next round-K around. Break yarn, leaving a tail. Thread yarn through tapestry needle and pull through remaining sts and pull tight. Darn in end.
Little Finger: Take 5 (5, 6) sts from palm and 6 (6, 6) sts from back of hand and place remaining sts on stitch holders. Place the 11 (11, 12) stitches between two needles. Pick up 2 sts from cast-on sts of ring finger. Divide sts between three needles. Work around in eyelet stitch, lining up eyelets with pattern on back of hand, until index finger is 1/4 inch from tip. *K2 tog. Repeat from * around. Next round-K around. Break yarn, leaving a tail. Thread yarn through tapestry needle and pull through remaining sts and pull tight. Darn in end.
Thumb: Divide sts for thumb on three needles, picking up 4 sts from 4 cast-on sts. Work in eyelet stitch until thumb measures 1/4 inch from tip, decreasing as for other fingers.
Left Glove: Work as for Right Glove, reversing shaping by putting thumb increases at end of first needle and starting left index finger above thumb shaping.
Finishing: Darn in yarn ends. Wash according to yarn label and lie flat to dry, pulling arm to length slightly.

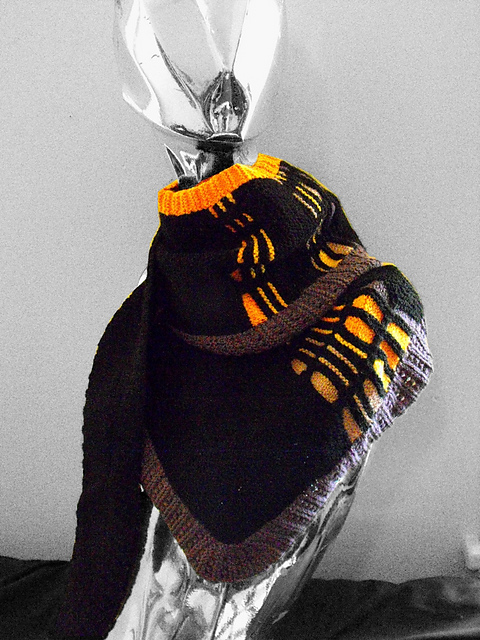
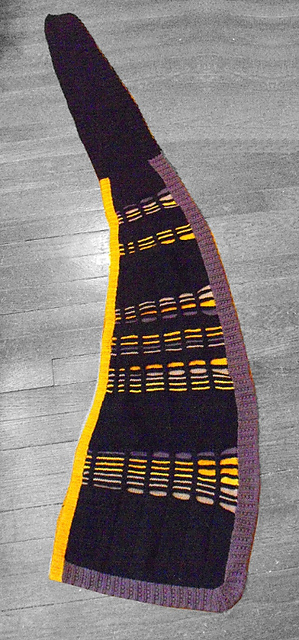
 Named for the brains of Isaac Asimov’s robots and Star Trek TNG’s
Soong-type androids, Positronic is a squishy garter-stitch scarf with an
easy shape and flashy graphics.
Named for the brains of Isaac Asimov’s robots and Star Trek TNG’s
Soong-type androids, Positronic is a squishy garter-stitch scarf with an
easy shape and flashy graphics.